Getting started
AutomA is an automated operating system hardening project, based on the rules and advice of leading cybersecurity authorities such as ANSSI. The aim of this user guide is to help you get to grips with the Web interface and configure the SSH service.
Environment selection
After clicking on Start on the home page, you will be asked to select the environment of the machines to be hardened.
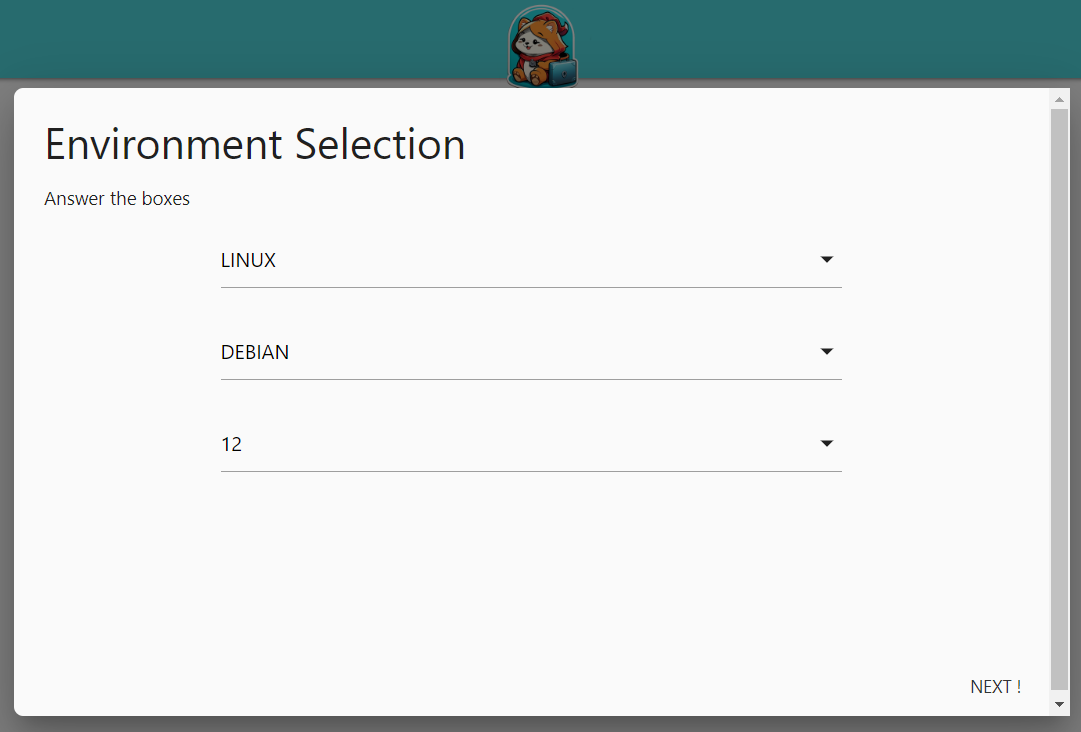
You can only harden one type of environment at a time
Host
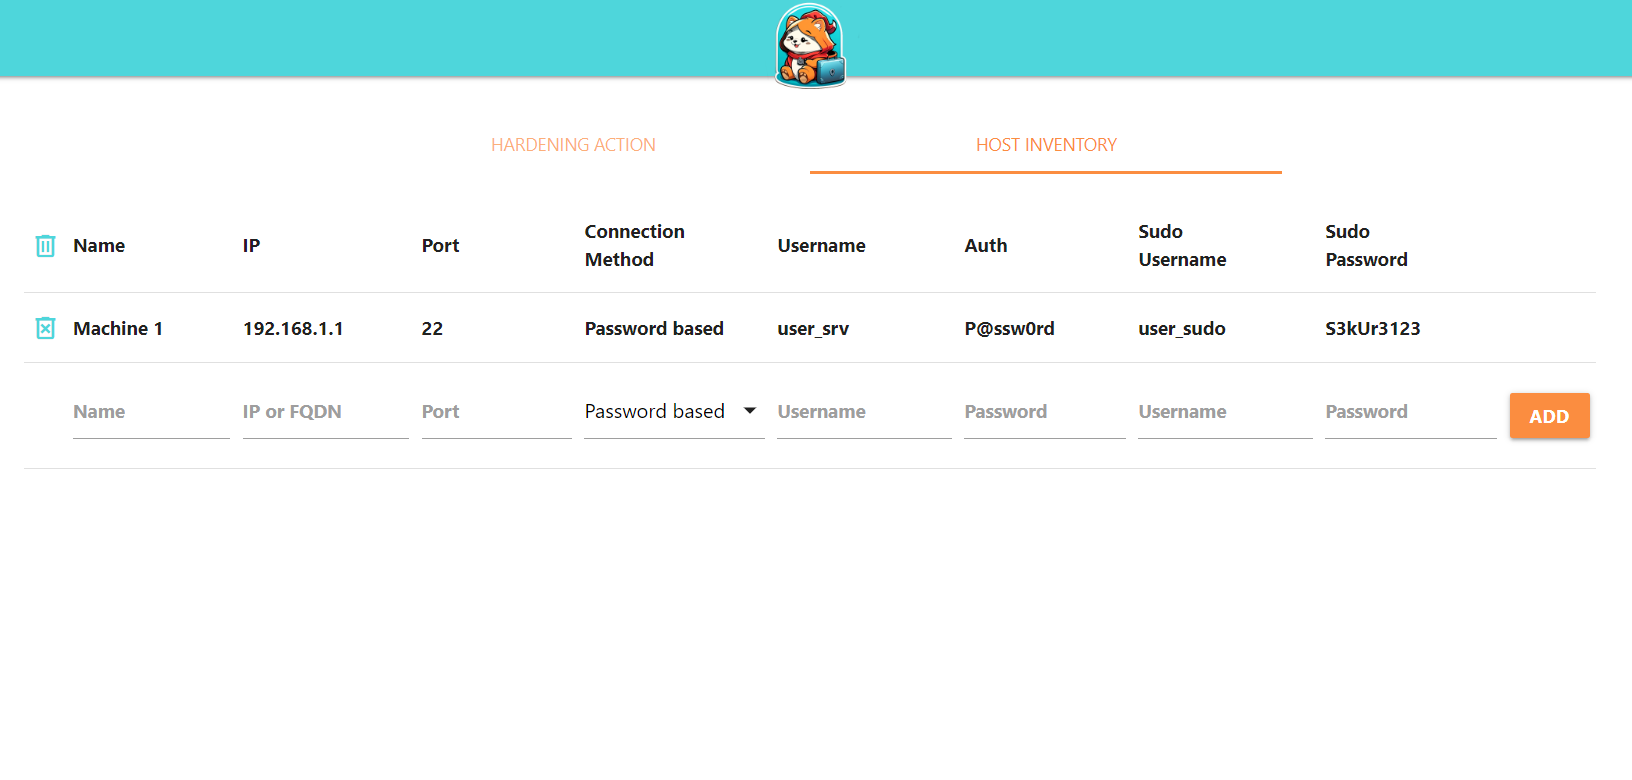
The machines to be secured must be entered in the HOST INVENTORY tab. This tab is used to define all the machines to be secured.
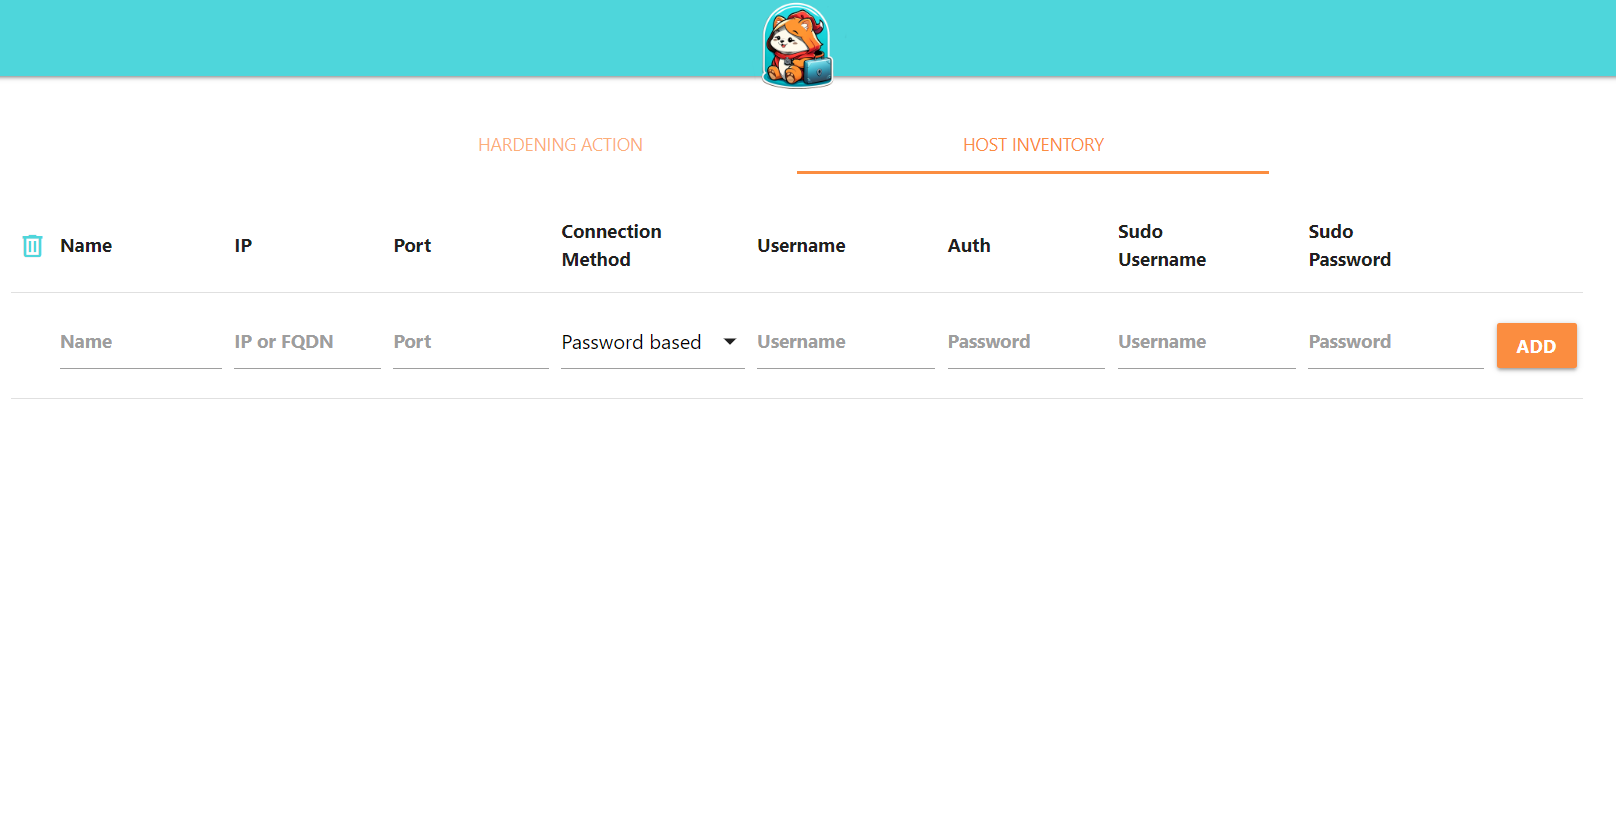
You must enter the following information:
- Name: A unique arbitrary name for your machine
- IP: Your machine’s IP address or FQDN (example: samba.local).
- Port: Your machine’s SSH listening port
- Connection Method: You can choose between password and key.
- Username : User name for SSH connection to your machine
- Auth : The password or path to your associated private key
- Sudo Username: The username for elevation of privilege
- Sudo Password : The password of the user with administrative rights.
Here is an example configuration:
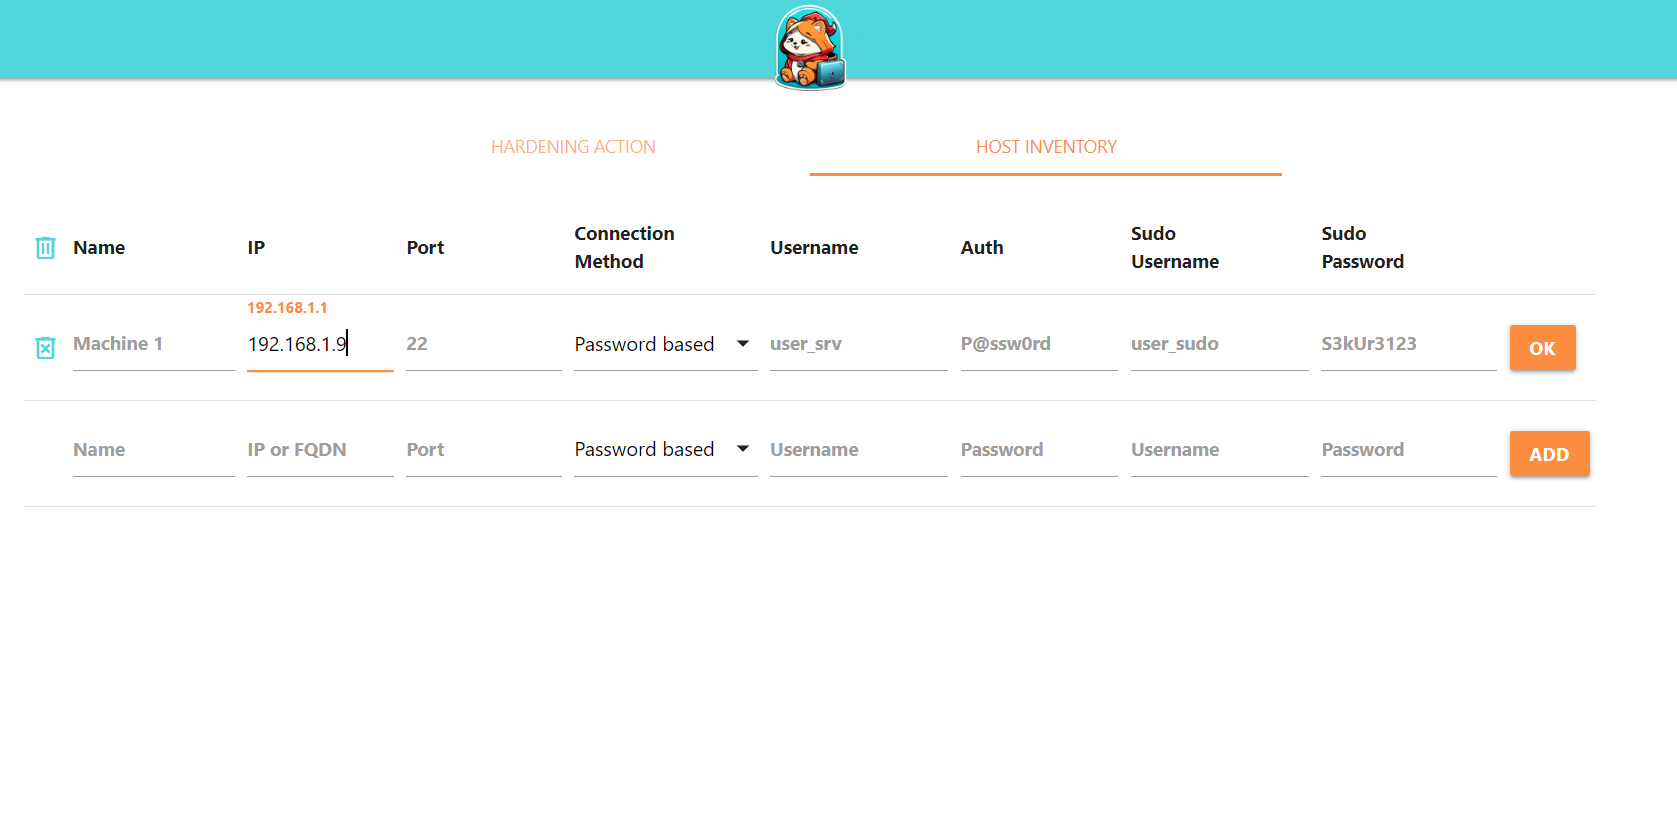
You can also modify every fields by clicking on it :
Generating actions
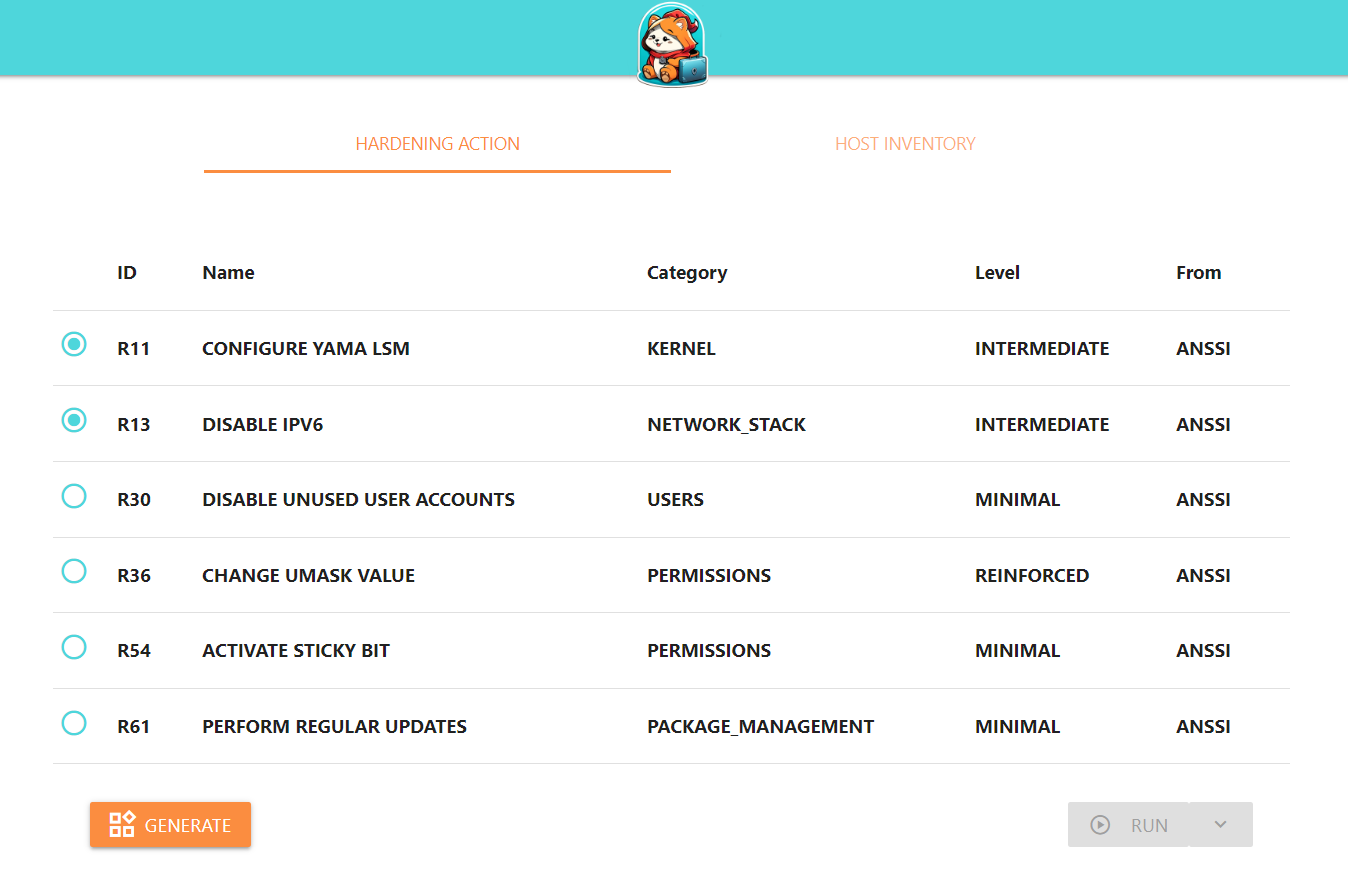
In the HARDENING ACTION tab, a list of hardening actions is available. These rules are classified according to :
- One of the following rule categories:
- KERNEL
- LOGGING
- MEMORY
- MONITORING
- NETWORK_STACK
- PACKAGE_MANAGEMENT
- PARTITIONING
- PERMISSIONS
- SERVICES
- USERS
- The recommendation level of the
- MINIMAL
- INTERMEDIATE
- REINFORCED
- HIGH
- Rule reference (ANSSI, NIST, etc …)
You can select a rule by clicking on it and validating:
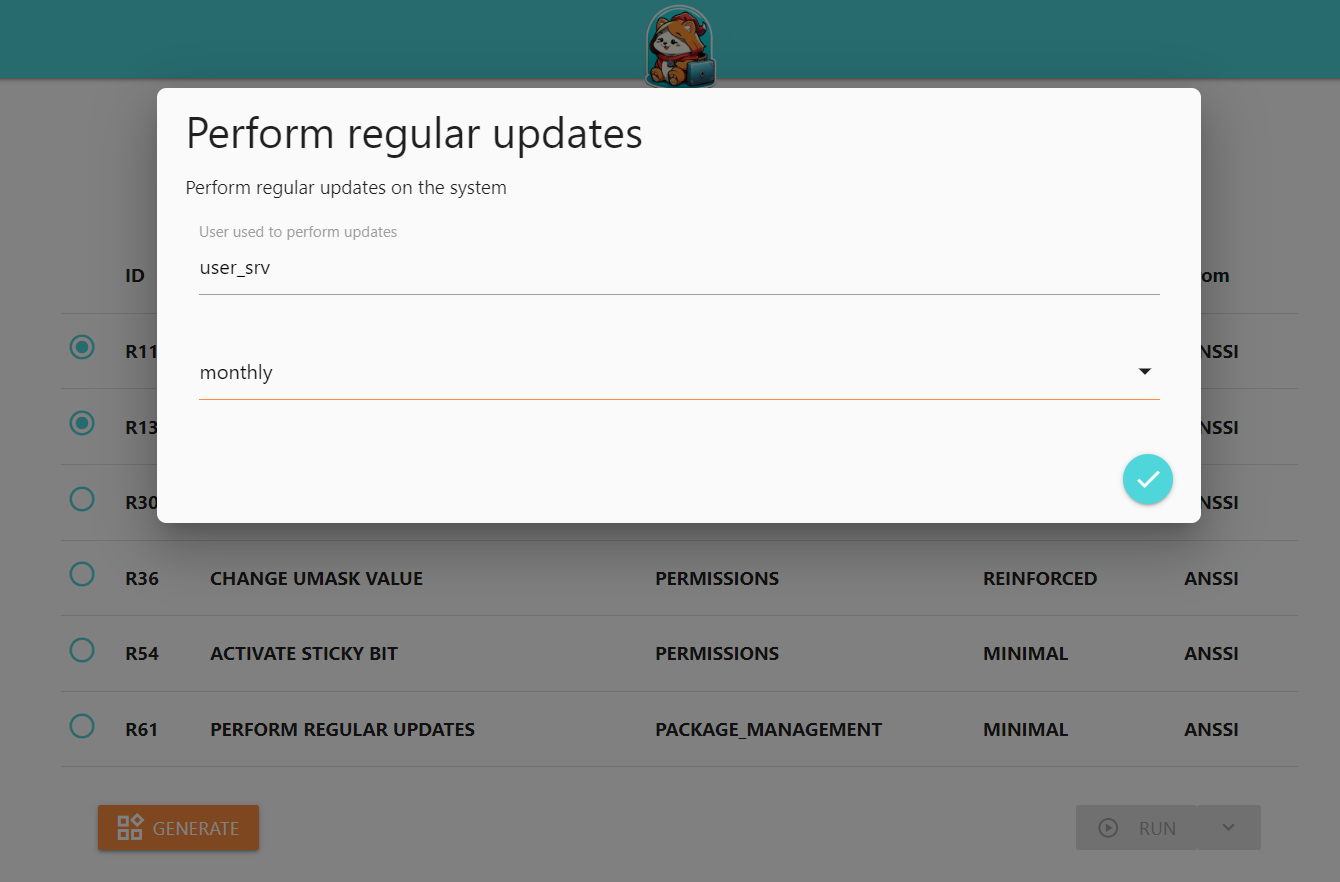
Some rules require additional information from the user to define the appropriate behavior.
For example, this rule enables automatic updates at a frequency that the user can select. A drop-down menu appears with a list of possible choices:
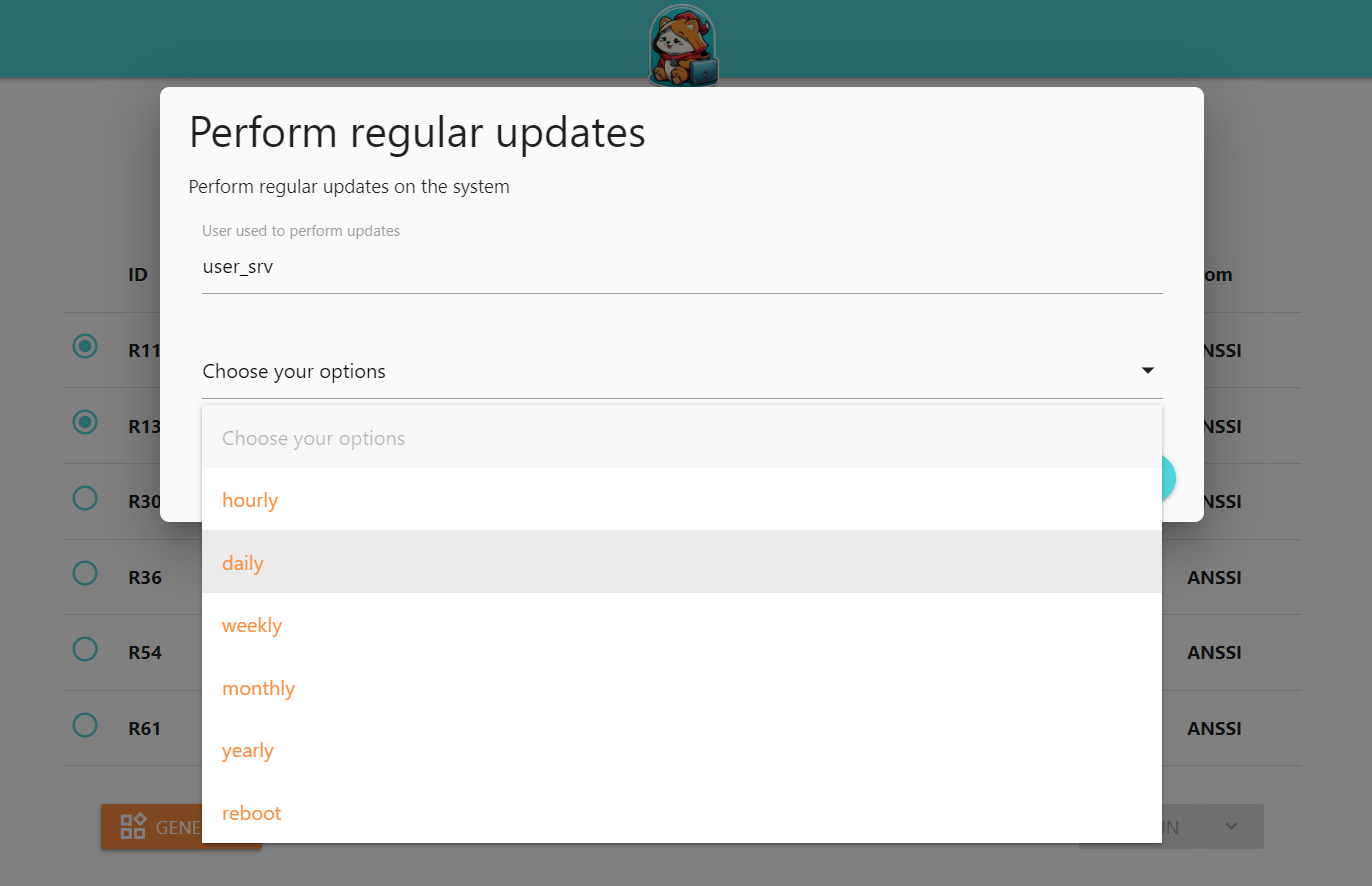
Here, we have selected monthly:
Run actions
Once the configuration is complete, the user must generate his configuration by clicking on the GENERATE button.
Then press the RUN button to launch the rules on the configured machines. Alternatively, click on the arrow to display the DOWNLOAD button, enabling you to retrieve all files for manual launch.
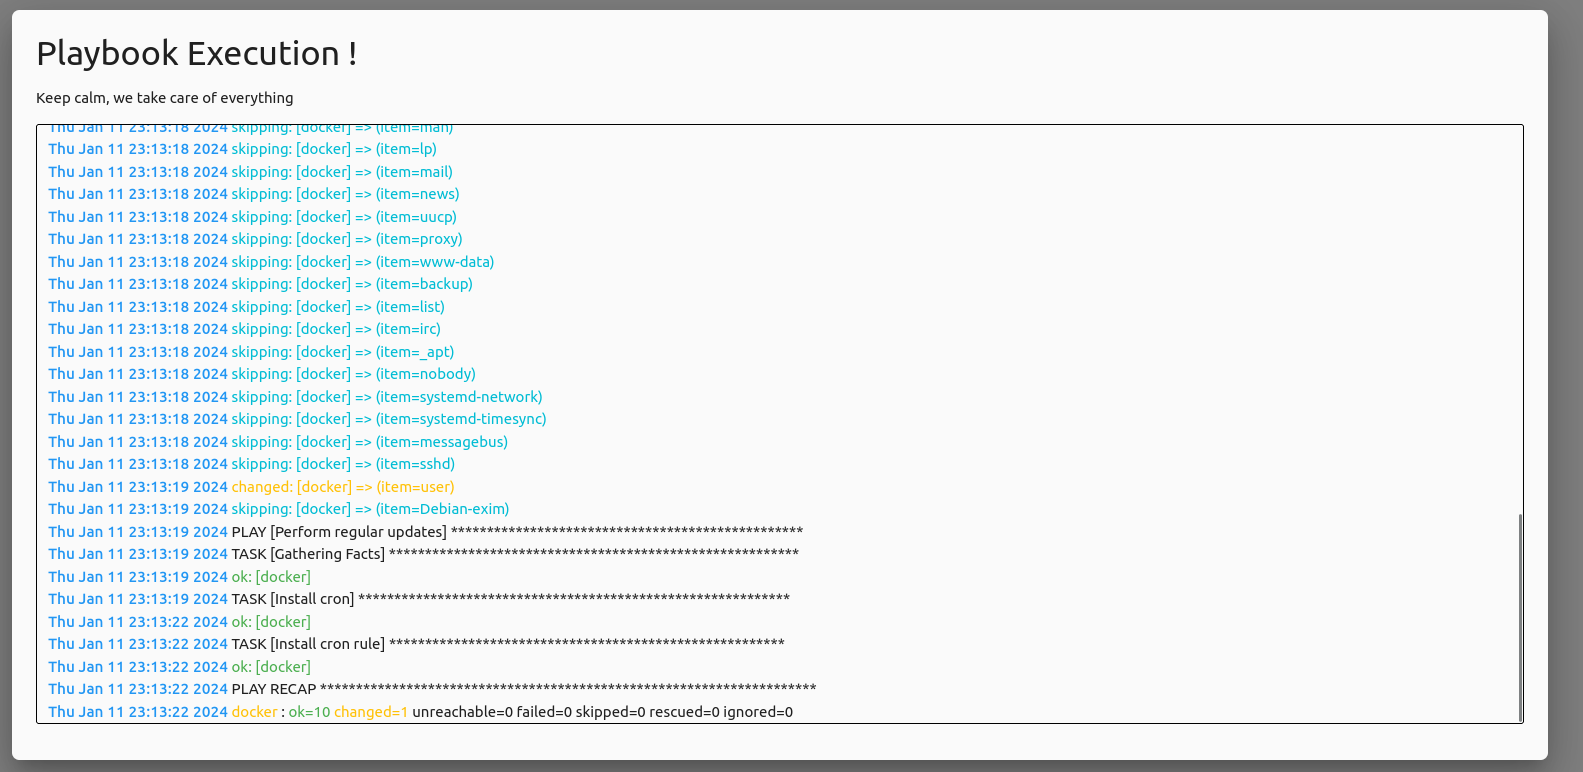
This allows us to observe the execution of playbooks and actions by generating logs directly on the interface :