app.selection.component.js
Functions
fillSelector(type, values, verificationFunction)
Fill selector with values and bind verification function
| Param | Type | Description |
|---|
| type | type | name of the selector |
| values | type | values |
| verificationFunction | type | values |
loadDataFromStorage(select_item, selectorId)
Load data of the selector from storage
| Param | Type | Description |
|---|
| select_item | M.FormSelect | Select element |
| selectorId | string | id of the selector |
storeInLocalStorage(value, selectorId)
Store data of the selector into storage
| Param | Type | Description |
|---|
| value | string | value to store |
| selectorId | string | id of the selector |
Remove an attribute to valid button
| Param | Type | Description |
|---|
| attributeName | string | Name of the attribute |
Change disabled attribute in validation button
| Param | Type | Description |
|---|
| bool | boolean | value of disabled attribute |
| attributeName | string | Name of the attribute |
reinitSelector(selector)
Reinit selector options, remove all options except the first one.
Summary: Remove all options in the dom except the first because in our case this first option is
used as a placeholder for the moment
| Param | Type | Description |
|---|
| selector | M.FormSelect | selector to clean |
resetChildSelector(childName)
Reset child
Summary: In our workflow reset a child selector has to reinit a child ONLY if the child
is already visible
| Param | Type | Description |
|---|
| childName | string | child name selector |
app.question.component.js
Functions
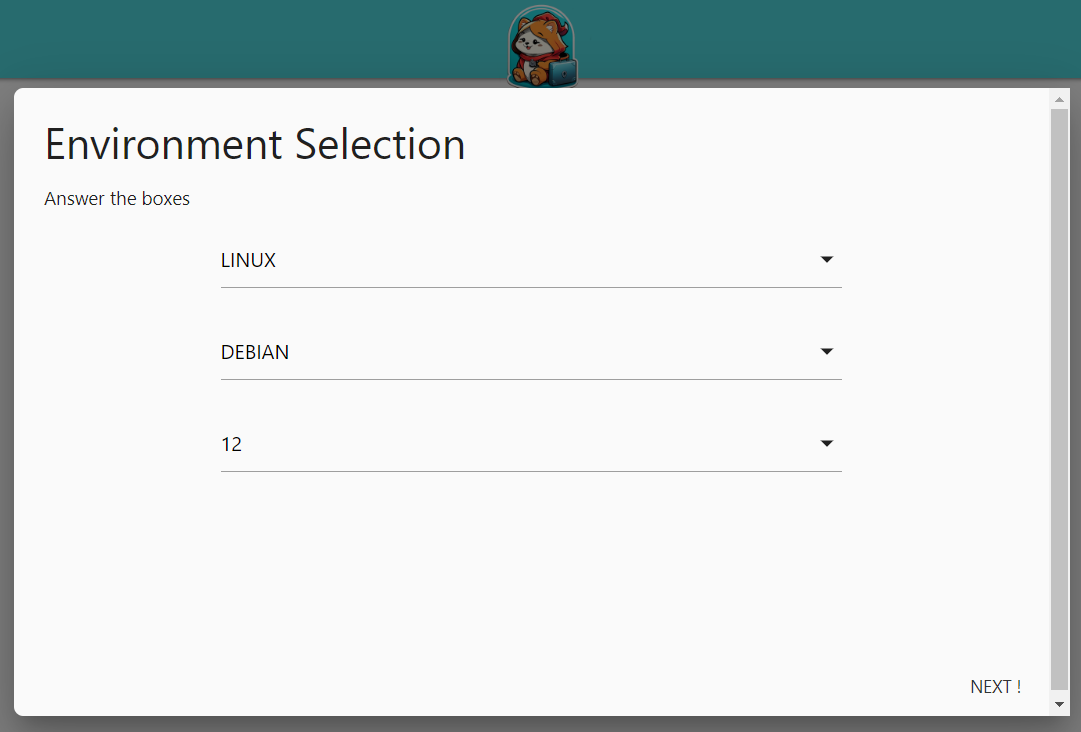
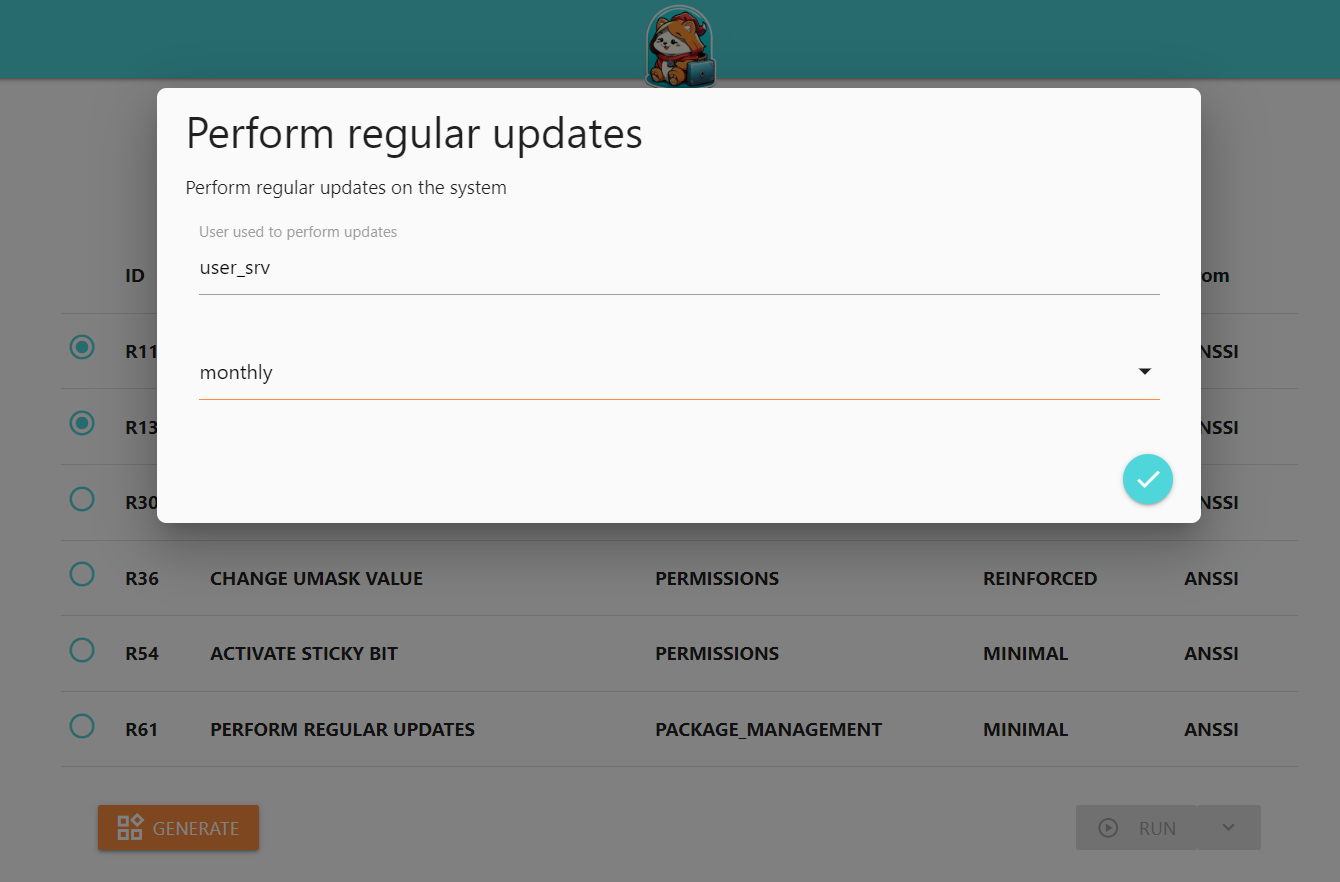
renderQuestion(_id)
If the modal template is already instatiated, the function open it else it creates
the modal. It takes the configuration of the question to choose which elements need to
be added to the modal (select, input, chips, …)
Summary: Display a modal template and fill it from config question
| Param | Type | Description |
|---|
| _id | _id | question UUID |
getAnswersValues(id, indexQuestion) ⇒ answer
Get answer value by id recommendation and index question from local storage
Returns: answer - answer - if exists or null
| Param | Type | Description |
|---|
| id | string | id of recommendation |
| indexQuestion | number | index of the question |
initializeMaterializeComponent()
Initialize Material components. This function need to be called after adding components
to the DOM. This method is useful because in our case, our components are returned
by our functions before adding them to the DOM. Some errors appears with Select component
with this workflow.
It’s base on global scope variable ‘MATERIALIZE_FIFO’
Summary: Initialize Material components wich need to be added to the DOM before
init
renderQuestionBtn()
Create validation button and bind it with the click event.
renderQuestionField(_id, index, one_field, answerStored) ⇒ HTMLElement
Render question from ‘render_field_str’ method in case of ‘str’ : input
Render question from ‘render_field_list_str’ method in case of ’list’ : chips
Render question from ‘render_field_choice_str’ method in case of ‘choice’ : select
Summary: Render question depending on the answer type
Returns: HTMLElement - HTMLElement - Brief description of the returning value here.
| Param | Type | Description |
|---|
| _id | _id | UUID of the recommendation |
| index | index | Index of question |
| one_field | one_field | configuration of the answer |
| answerStored | answerStored | answer if exists or null |
renderFieldStr(_id, index, one_field, answerStored) ⇒ HTMLElement
Render question method in case of ‘str’ : it creates an input
Returns: HTMLElement - HTMLElement - Brief description of the returning value here.
| Param | Type | Description |
|---|
| _id | _id | UUID of the recommendation |
| index | index | Index of question |
| one_field | one_field | configuration of the answer |
| answerStored | answerStored | answer if exists or null |
renderFieldListStr(_id, index, one_field, answerStored) ⇒ HTMLElement
Render question method in case of ’list’ : it creates a chips element
Returns: HTMLElement - HTMLElement - Brief description of the returning value here.
| Param | Type | Description |
|---|
| _id | _id | UUID of the recommendation |
| index | index | Index of question |
| one_field | one_field | configuration of the answer |
| answerStored | answerStored | answer if exists or null |
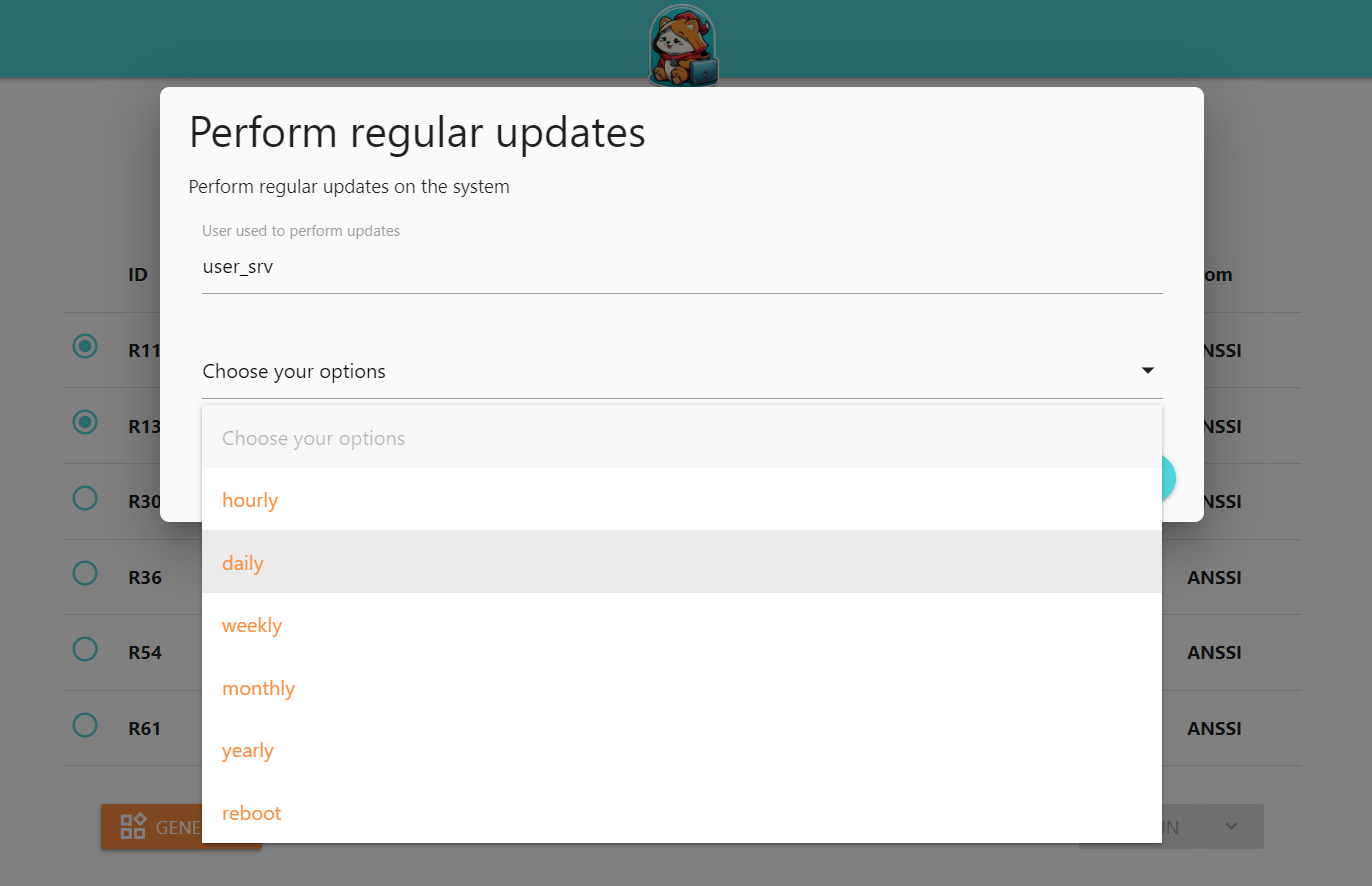
renderFieldChoiceStr(_id, index, one_field, answerStored) ⇒ HTMLElement
Render question method in case of ‘choice’ : it creates a select element
The Select element is an
Returns: HTMLElement - HTMLElement - Brief description of the returning value here.
| Param | Type | Description |
|---|
| _id | _id | UUID of the recommendation |
| index | index | Index of question |
| one_field | one_field | configuration of the answer |
| answerStored | answerStored | answer if exists or null |
Get data from chips in case of ’list’, it takes values from a chips elements and
add it to the local storage
| Param | Type | Description |
|---|
| inputComponent | input_component | Chips element |
| configType | configType | Configuration of the field |
Get data from input in case of ‘str’, it takes valueand
add it to the local storage
| Param | Type | Description |
|---|
| inputComponent | input_component | Chips element |
| configType | configType | Configuration of the field |
Update local storage with a new value. If the answer value is empty, it’s remove from local storage.
If there’s already a value present, we update this value.
Summary: Update local storage with a new value.
| Param | Type | Description |
|---|
| inputComponent | inputComponent | inputComponent is a DOM Element, it has an id : UUIDRecommendation-index |
| dataToSave | dataToSave | Data already process for the back, this value will be sent |
| configType | configType | config type of the question |
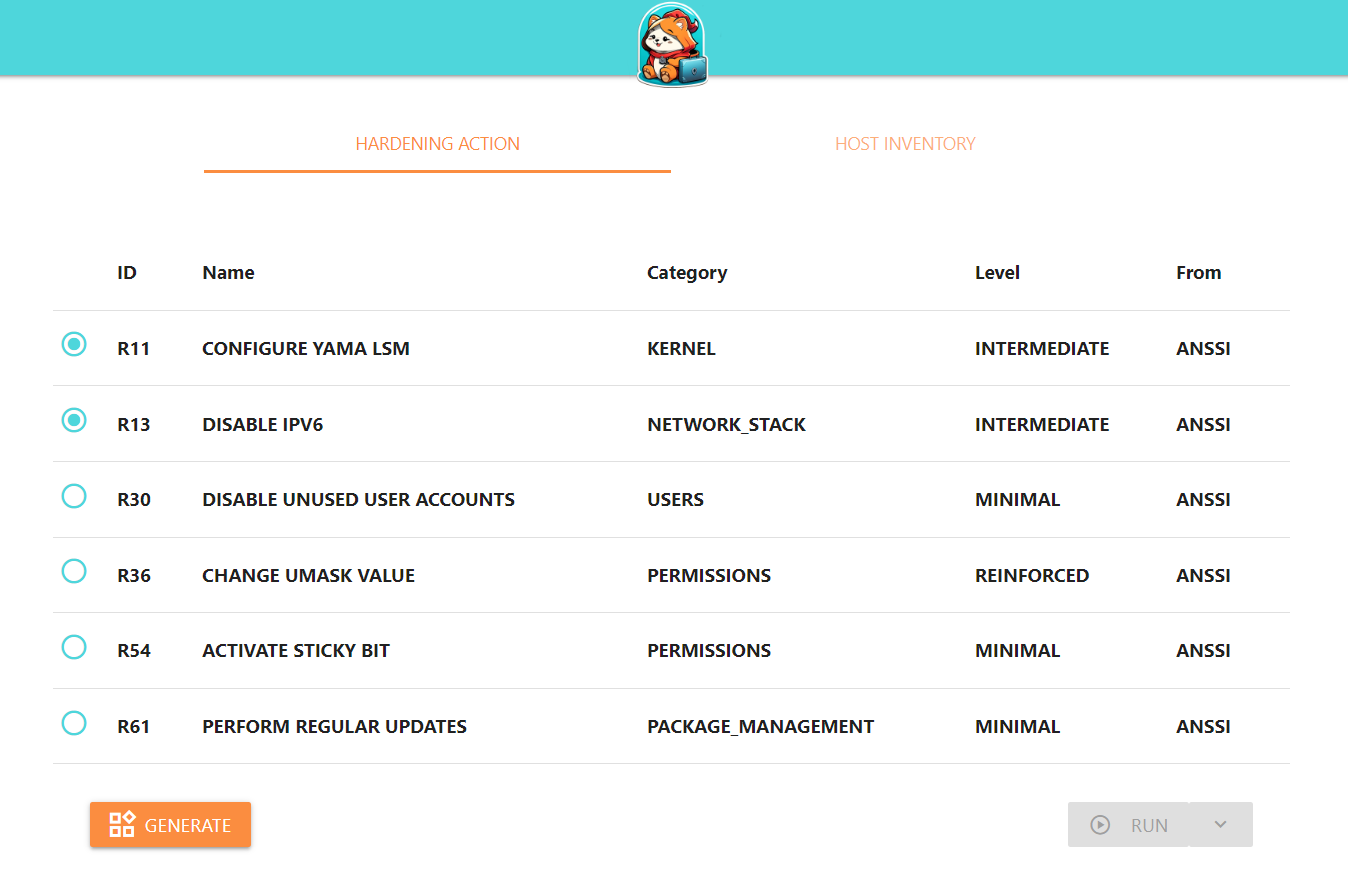
storeSelectedIds(id)
Manage selected IDS. Based on verification about storage item with UUID of the recommendation.
If an item with the same id does not exists, we remove the id from the data
We also check the local storage to create it if it’s not exists.
Summary: Manage selected IDS stored in store
| Param | Type | Description |
|---|
| id | ParamDataTypeHere | ID of recommendation |
Store answer data to localStorage
| Param | Type | Description |
|---|
| id | inputComponent | Id of recommendation |
| valueFormat | inputComponent | Data formated by our function to be store |
| dataToSave | inputComponent | data to check if it’s not empty in order to remove local storage |
Format a value in order to be store in local storage. It’s a JSON format with three keys :
value, formatType, index
Returns: string - Object - id, valueFormat
| Param | Type | Description |
|---|
| inputComponent | inputComponent | Input component is needed to retrieve the index of answer and id recommendation |
| dataToSave | inputComponent | Data in value |
| configType | inputComponent | Configuration of this answer to send type answer to the back |